
Microsoft 365
Sign in with Microsoft 365
Let people sign in to a workspace with their Microsoft 365 or Office 365 work or school account, using Microsoft Entra ID.
This guide connects a workspace to Microsoft 365 (formerly Office 365) so people can sign in with the same work or school account they already use for Outlook, Teams, and other Microsoft apps.
Behind the scenes, Microsoft 365 sign-in is handled by Microsoft Entra ID (formerly Azure Active Directory). You register Verentis as an application in Microsoft Entra ID, then copy a few values into the workspace's OAuth settings.
Two parts to this guide
First you configure Microsoft Entra ID in the Azure portal. Then you apply those values in the Verentis workspace OAuth settings. Keep both open in separate tabs so you can copy values across.
What you'll need
- An Azure account that can create app registrations in your organisation's Microsoft Entra ID. This usually means the Application Administrator, Cloud Application Administrator, or Global Administrator role.
- Access to the workspace's OAuth settings in Verentis.
- A few minutes to copy values between Azure and Verentis.
If terms like authority, client ID, or client secret are new, read OAuth and OIDC explained first.
The redirect URL Verentis uses
When you register the application in Microsoft Entra ID, you must add Verentis's redirect URL (also called a callback URL). This is the address Microsoft returns people to after they sign in.
Every workspace uses the same address — the Verentis API for this environment:
https://api.uat.verentis.dev/connect/callbackAdd this address exactly
Add this as a redirect URL in Microsoft Entra ID exactly as shown, including https:// and with no trailing slash. It is the Verentis API gateway for this environment, so it is the same for every workspace. For example, in the sprint-1 environment it is https://api.sprint-1.verentis.dev/connect/callback.
Values you'll copy between Azure and Verentis
You will move these four values from Microsoft Entra ID into the Verentis OAuth settings.
Directory (tenant) IDfrom AzureIdentifies your organisation's Microsoft Entra ID. You use it to build the authority URL below.
Application (client) IDfrom AzureThe public identifier for the Verentis app you register. Goes into the Client ID field in Verentis.
Client secret valuefrom AzureA password-like value for the app. Goes into the Client secret field in Verentis.
Authority / Issuer URLyou build thisThe sign-in address for your tenant. Build it from your tenant ID: https://login.microsoftonline.com/<tenant-id>/v2.0.
Part 1 — Configure Microsoft Entra ID in Azure
Open Microsoft Entra ID in the Azure portal
Sign in to the Azure portal with an account that can manage app registrations.
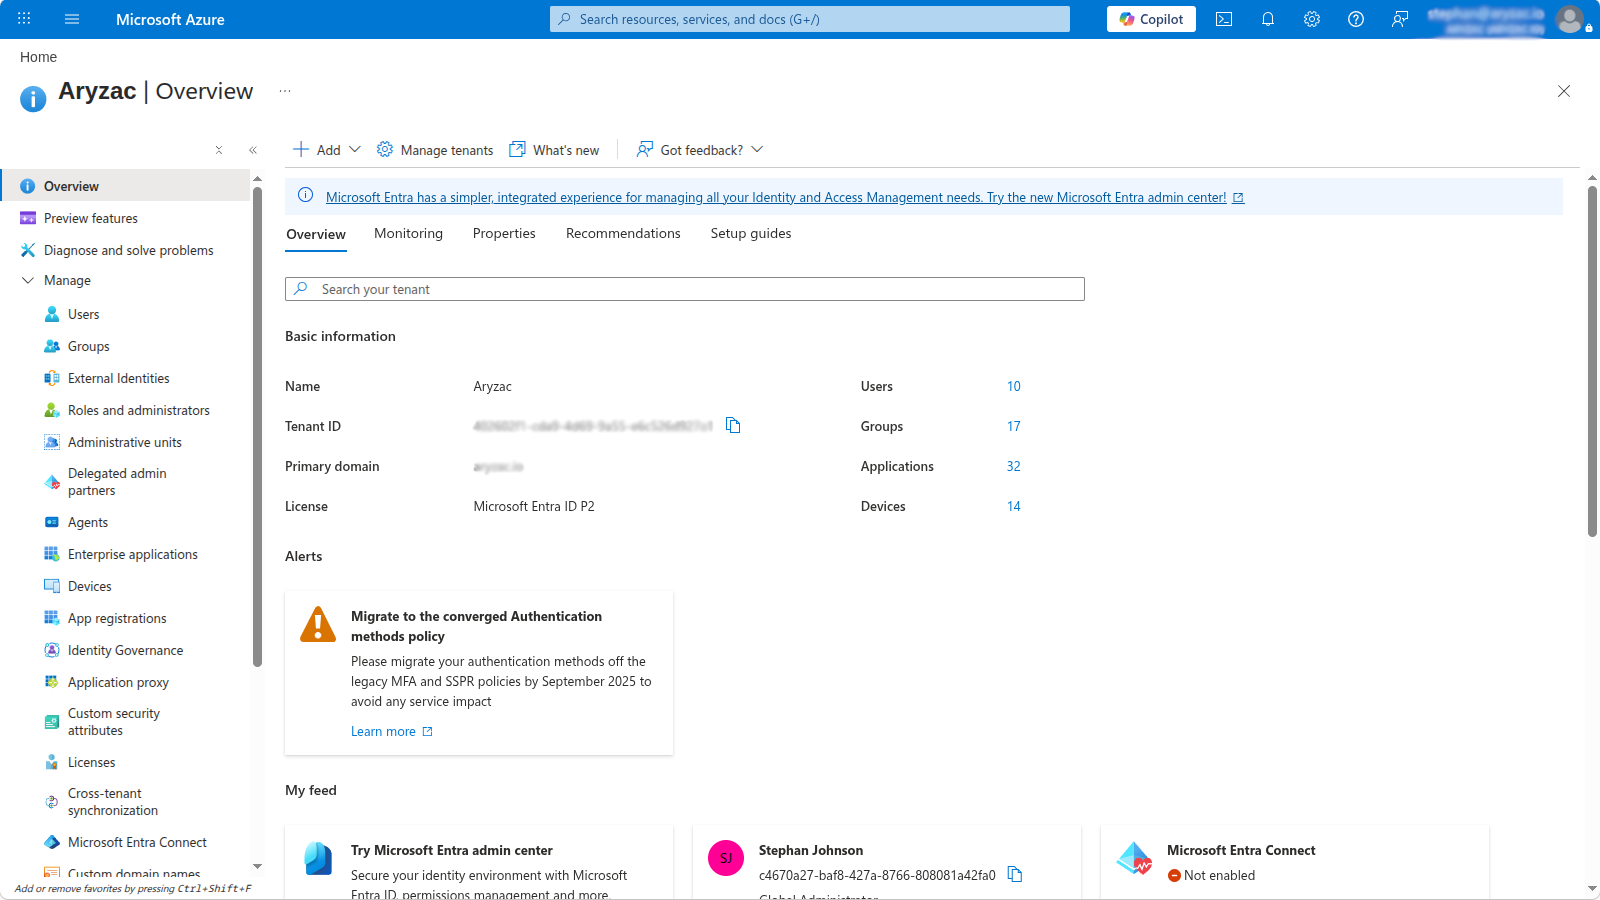
In the top search bar, type Microsoft Entra ID and open it. This was previously called Azure Active Directory.
Open App registrations and create a new registration
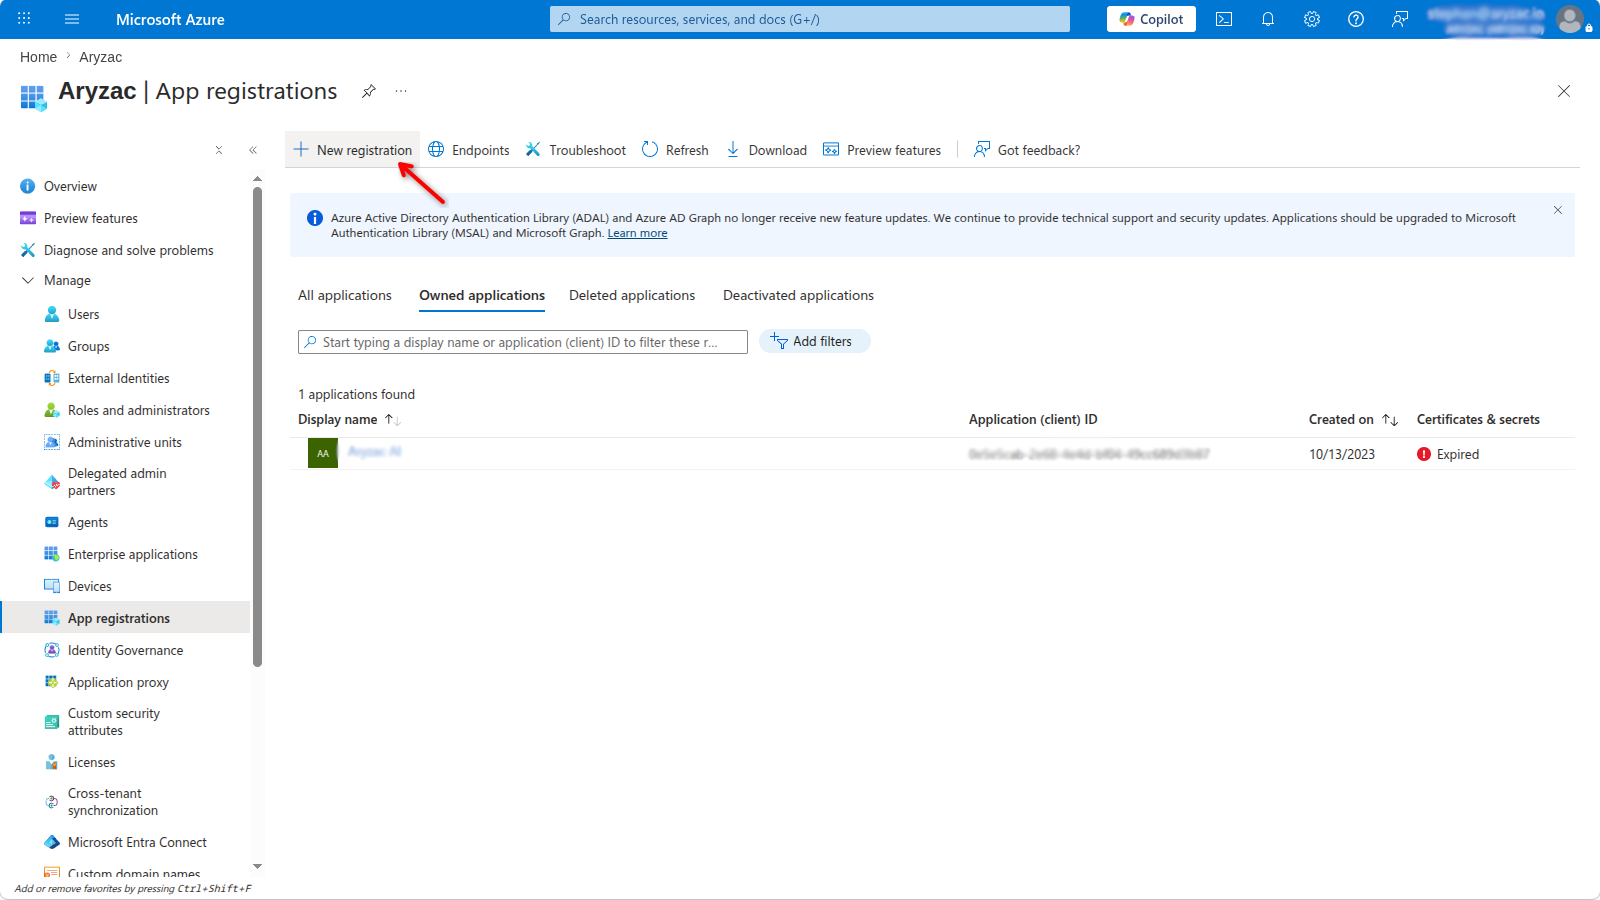
In the Microsoft Entra ID menu, select App registrations, then + New registration.
Name the app and choose who can sign in
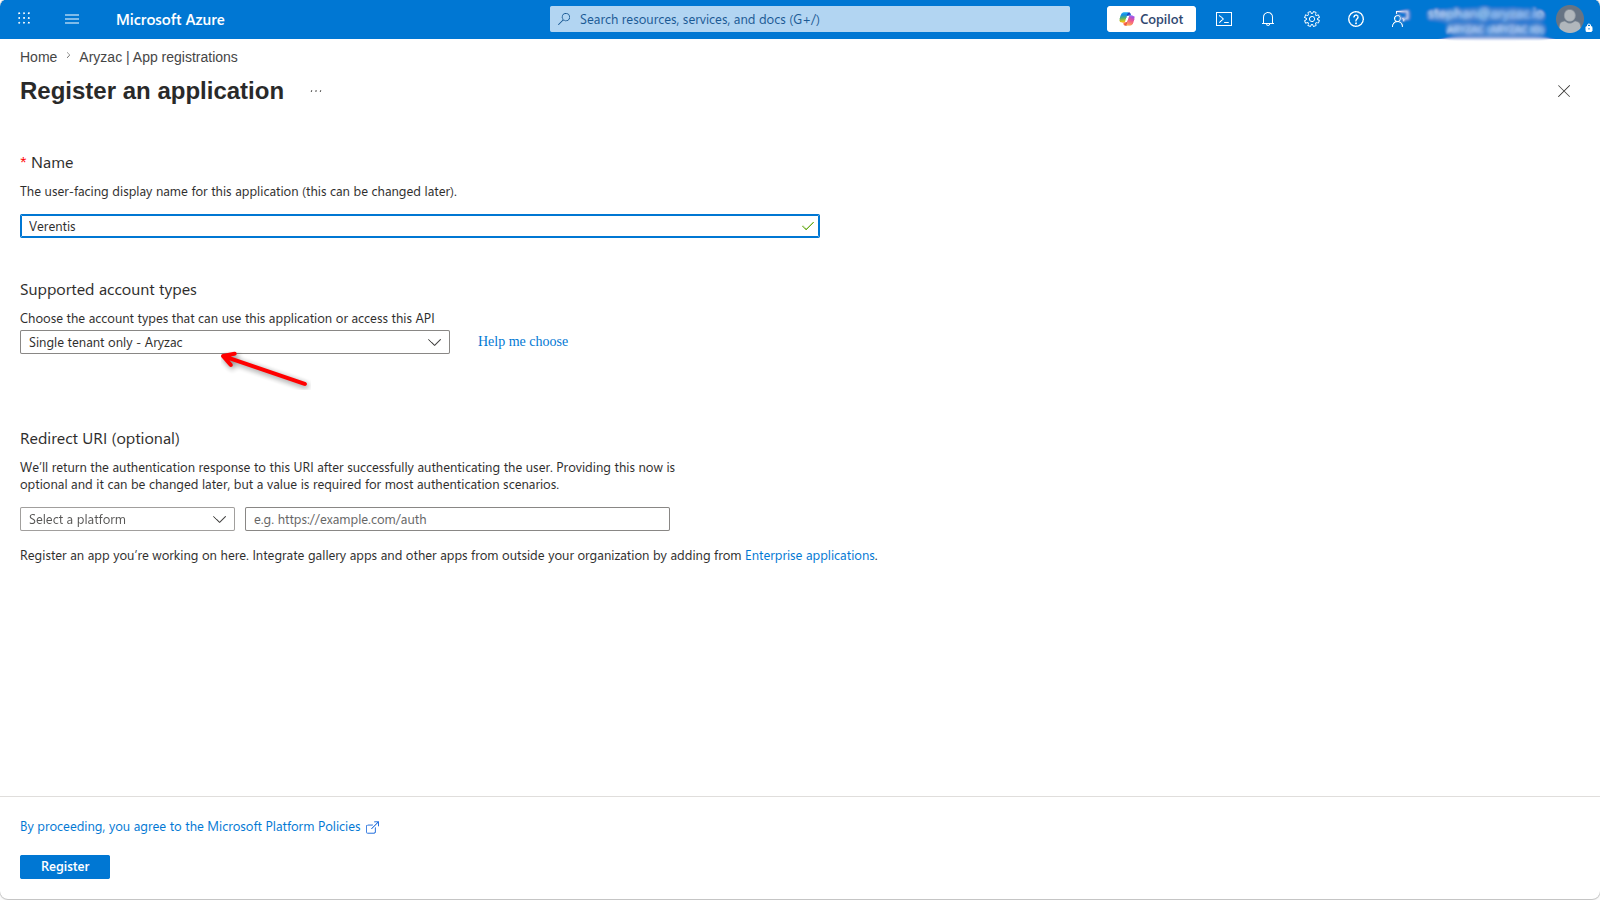
Give the app a clear name, such as Verentis – Marketing workspace. People do not see this name during sign-in.
Under Supported account types, choose Accounts in this organizational directory only (single tenant) so that only your organisation's Microsoft 365 accounts can sign in.
Add the Verentis redirect URL and register
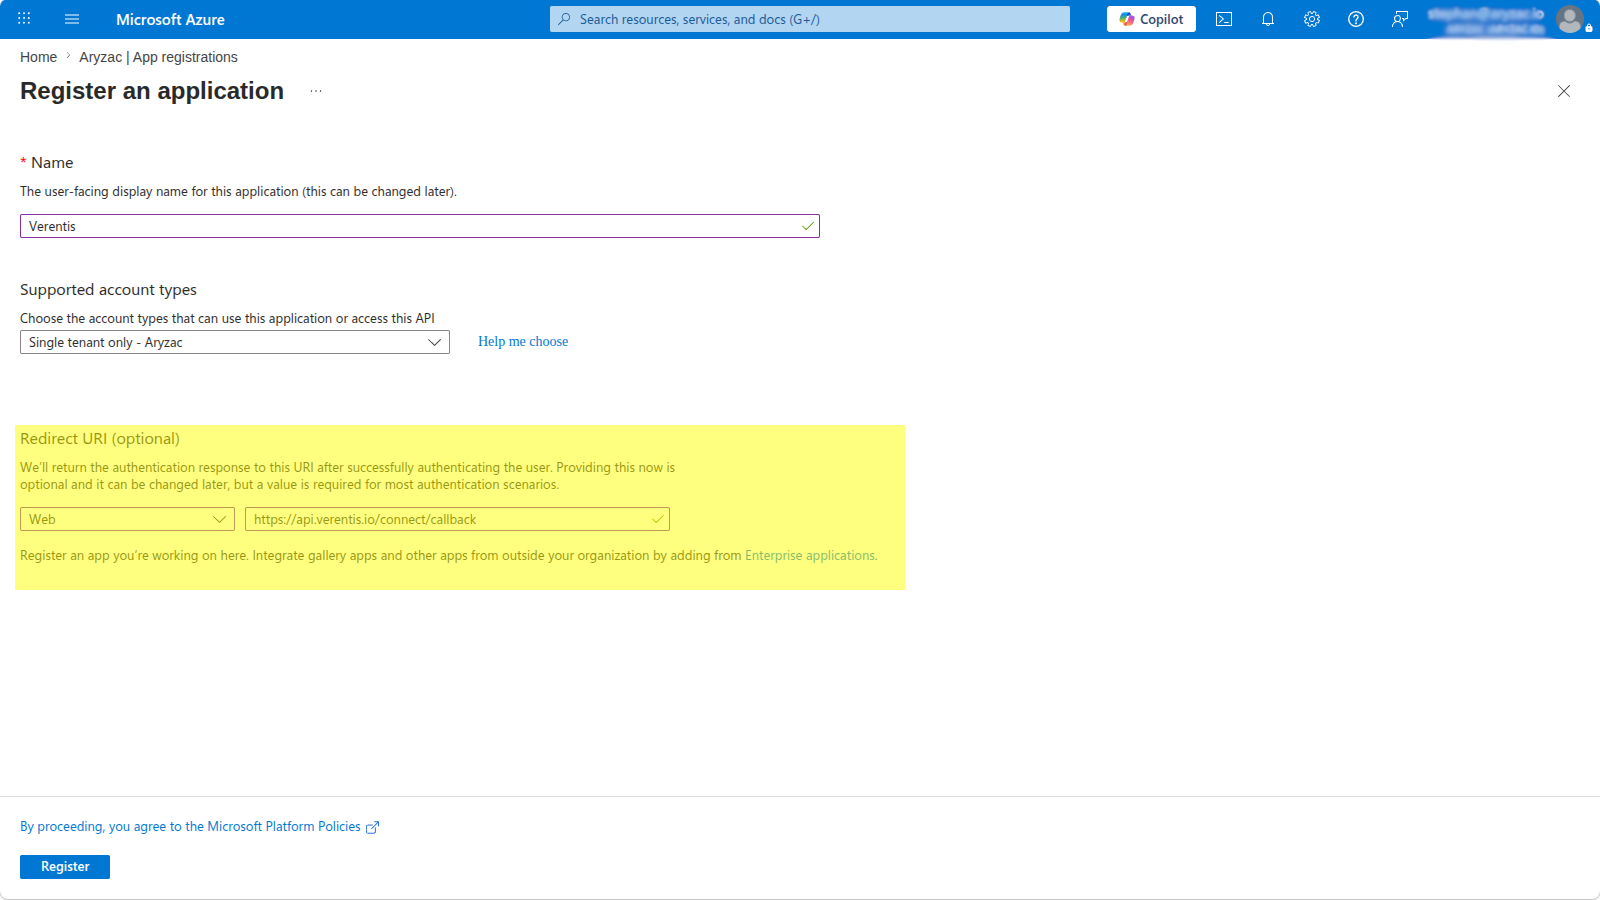
Under Redirect URI (optional), choose the platform Web, then paste Verentis's callback address:
https://api.uat.verentis.dev/connect/callbackSelect Register to create the app.
Copy the Application (client) ID and Directory (tenant) ID
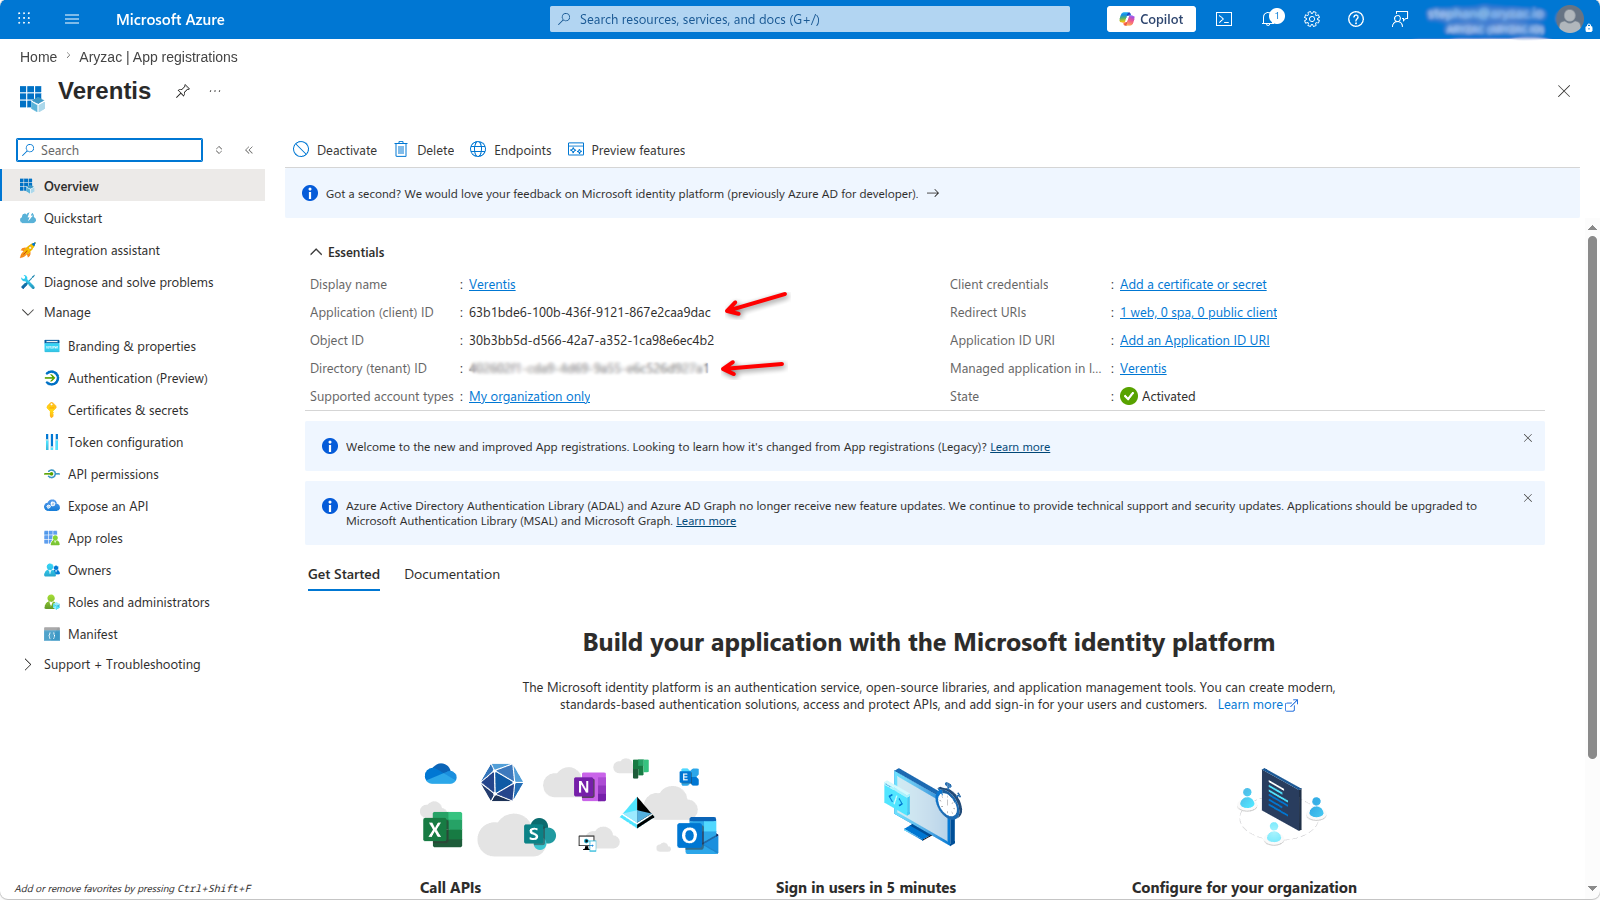
On the app's Overview page, copy the Application (client) ID and the Directory (tenant) ID. Keep them somewhere safe for the next part.
Create a client secret
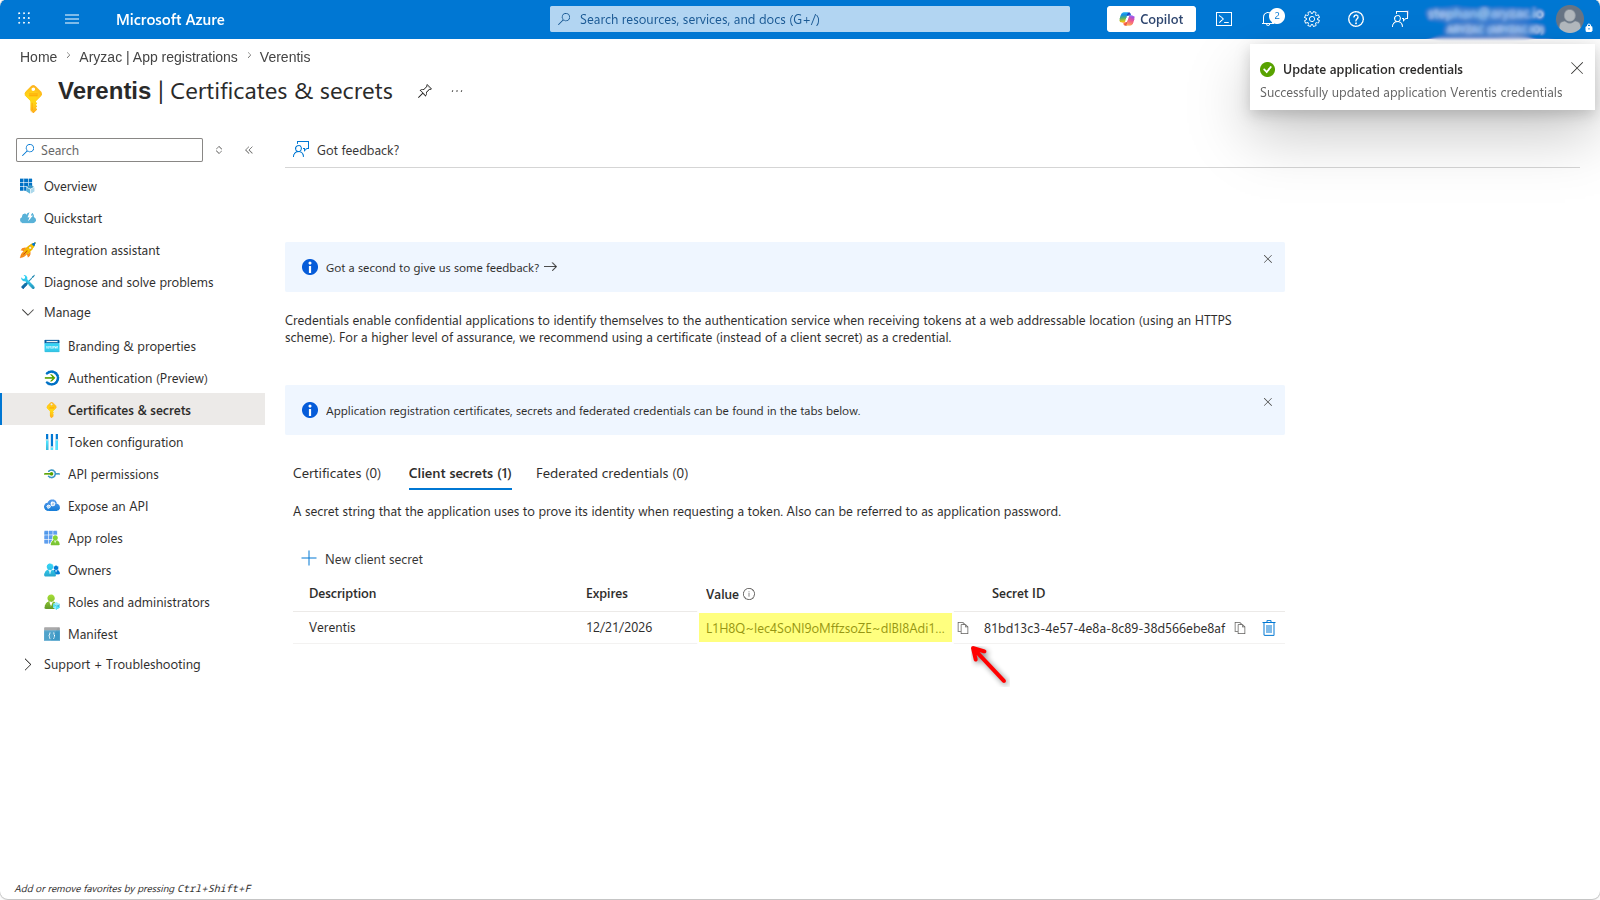
Go to Certificates & secrets, open the Client secrets tab, and select + New client secret.
Add a description and an expiry, then select Add.
Copy the secret value now
Copy the secret Value straight away. Microsoft only shows it once. If you leave the page, you'll have to create a new secret. Copy the Value, not the Secret ID.
Confirm the sign-in permissions
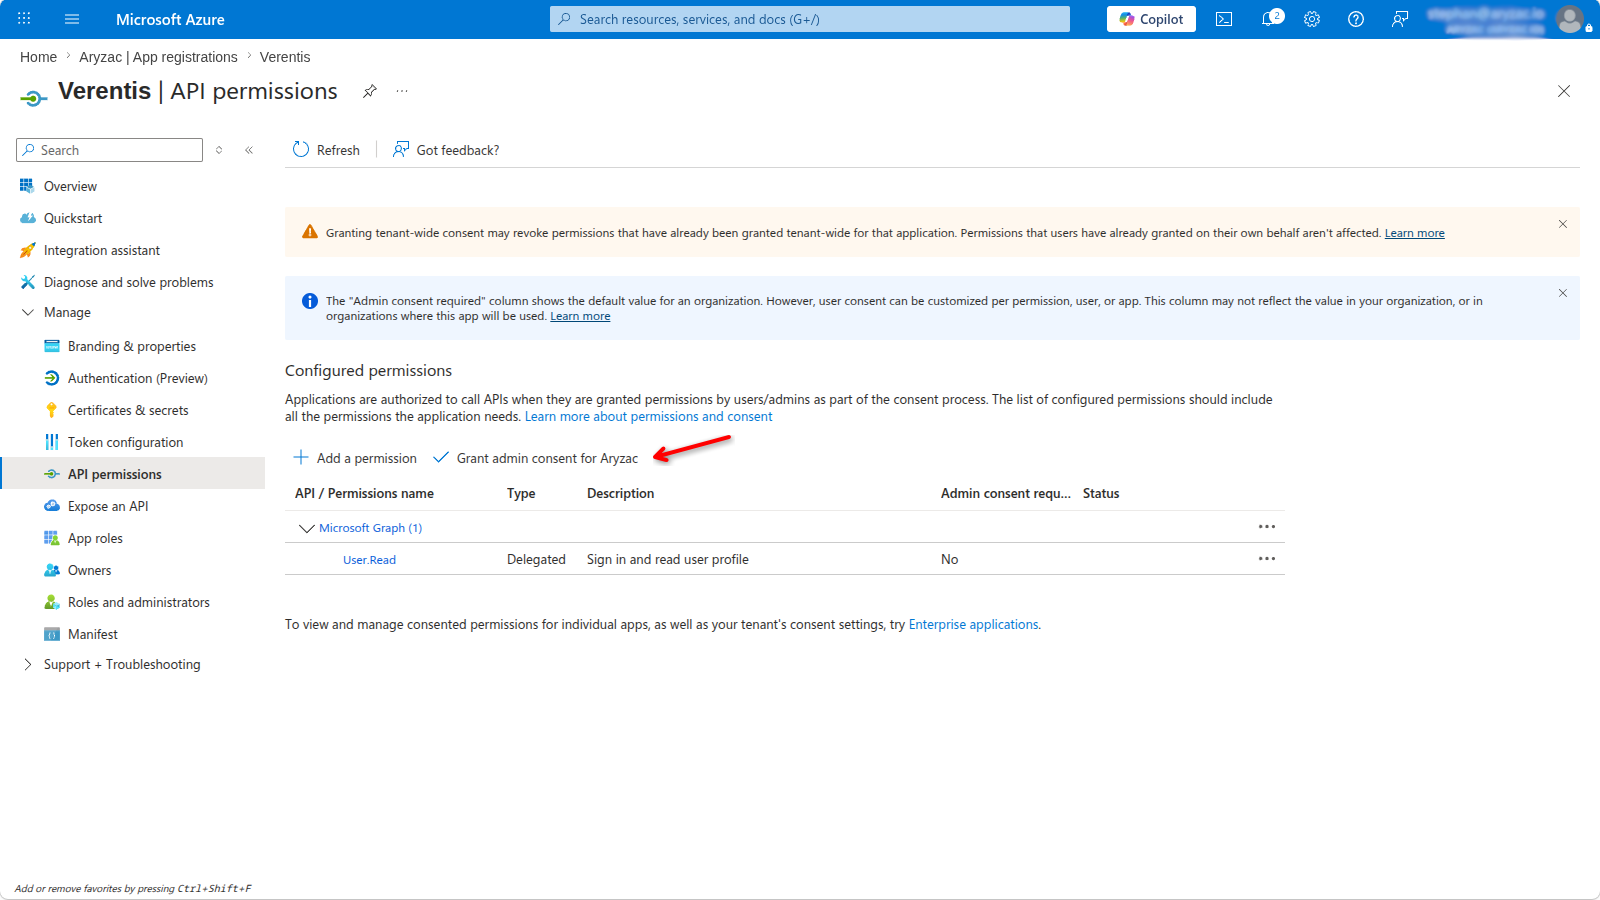
Open API permissions. By default the app has the Microsoft Graph User.Read permission, which includes the openid, profile, and email sign-in scopes Verentis needs.
If your organisation requires it, select Grant admin consent for <your organisation>.
You now have everything from Azure: the tenant ID, the client ID, and the client secret value.
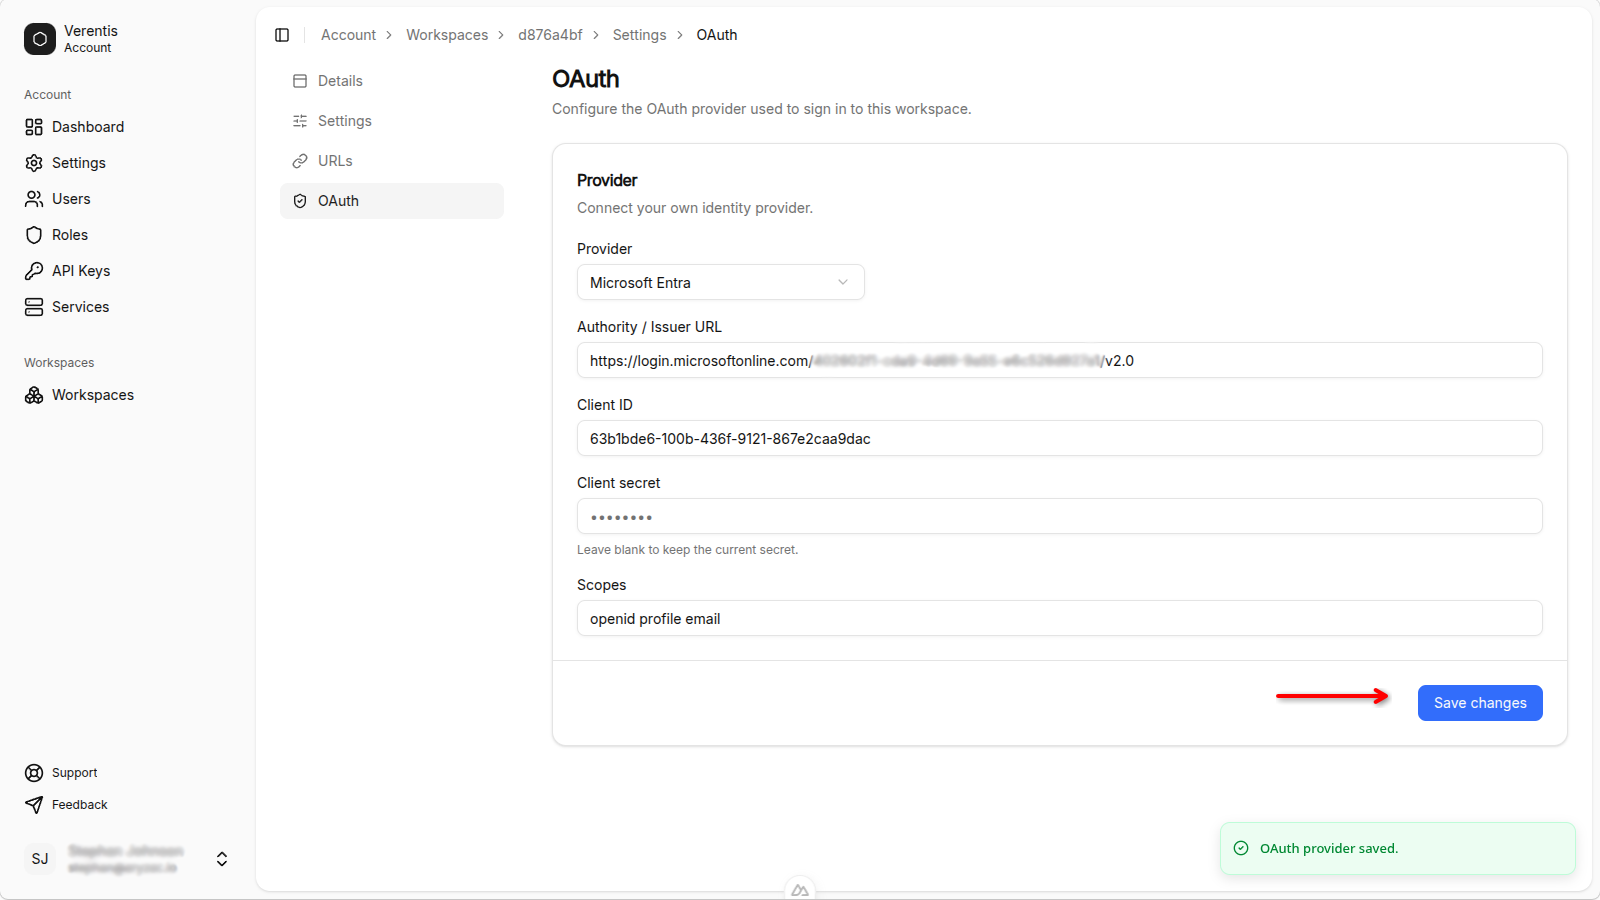
Part 2 — Apply the settings in Verentis
Open the workspace's OAuth settings
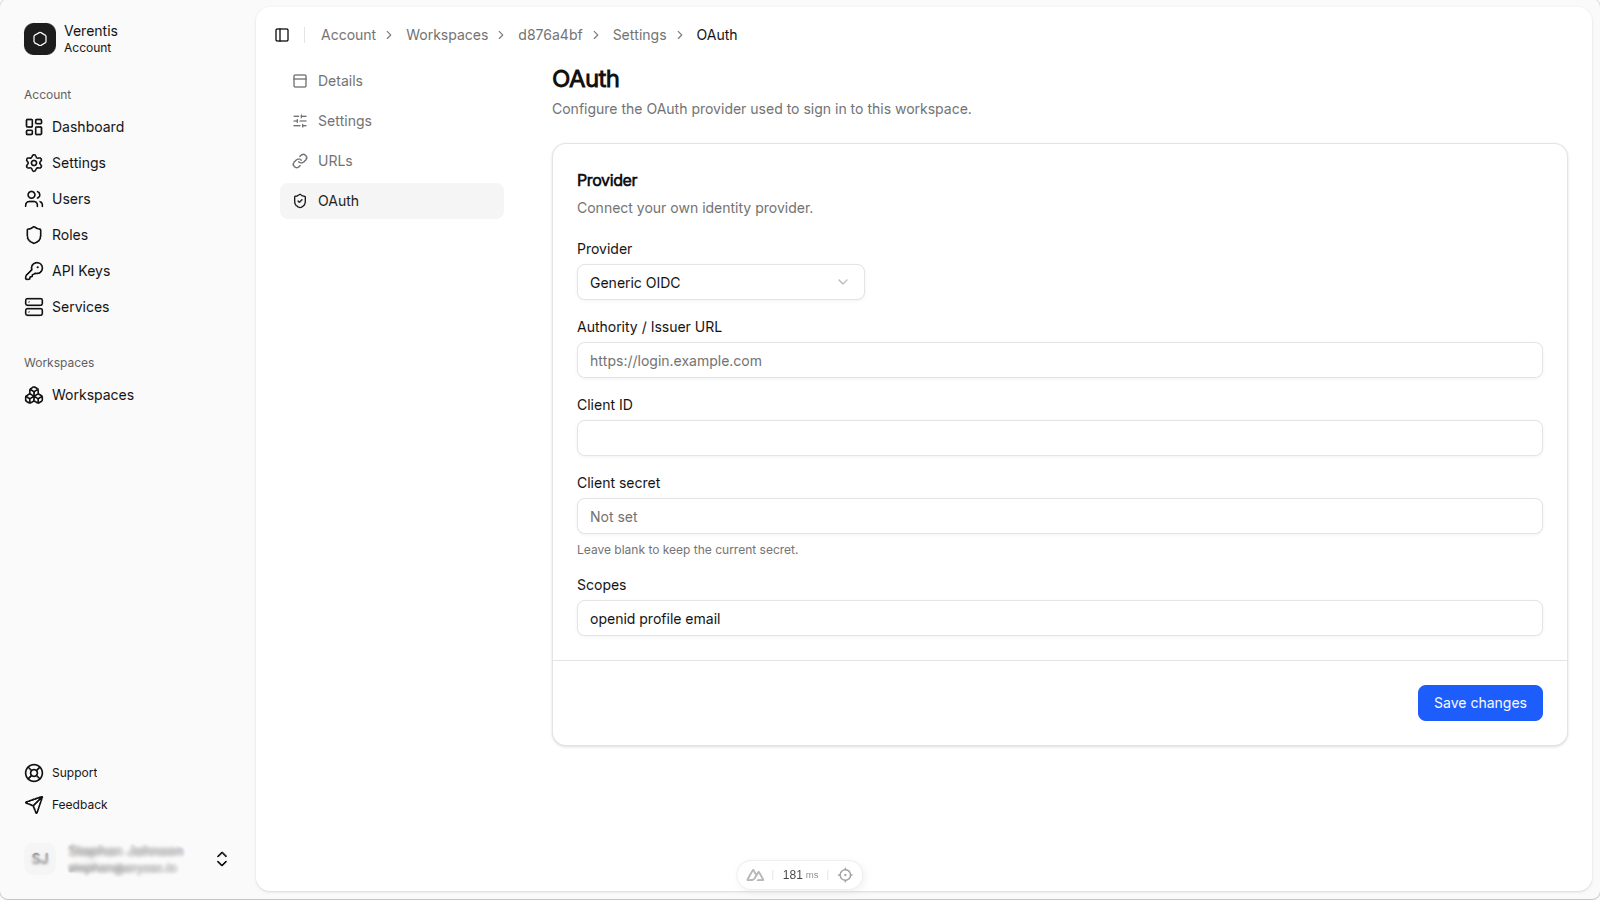
In the Account app, open Workspaces, choose the workspace, then open Settings and select the OAuth screen.
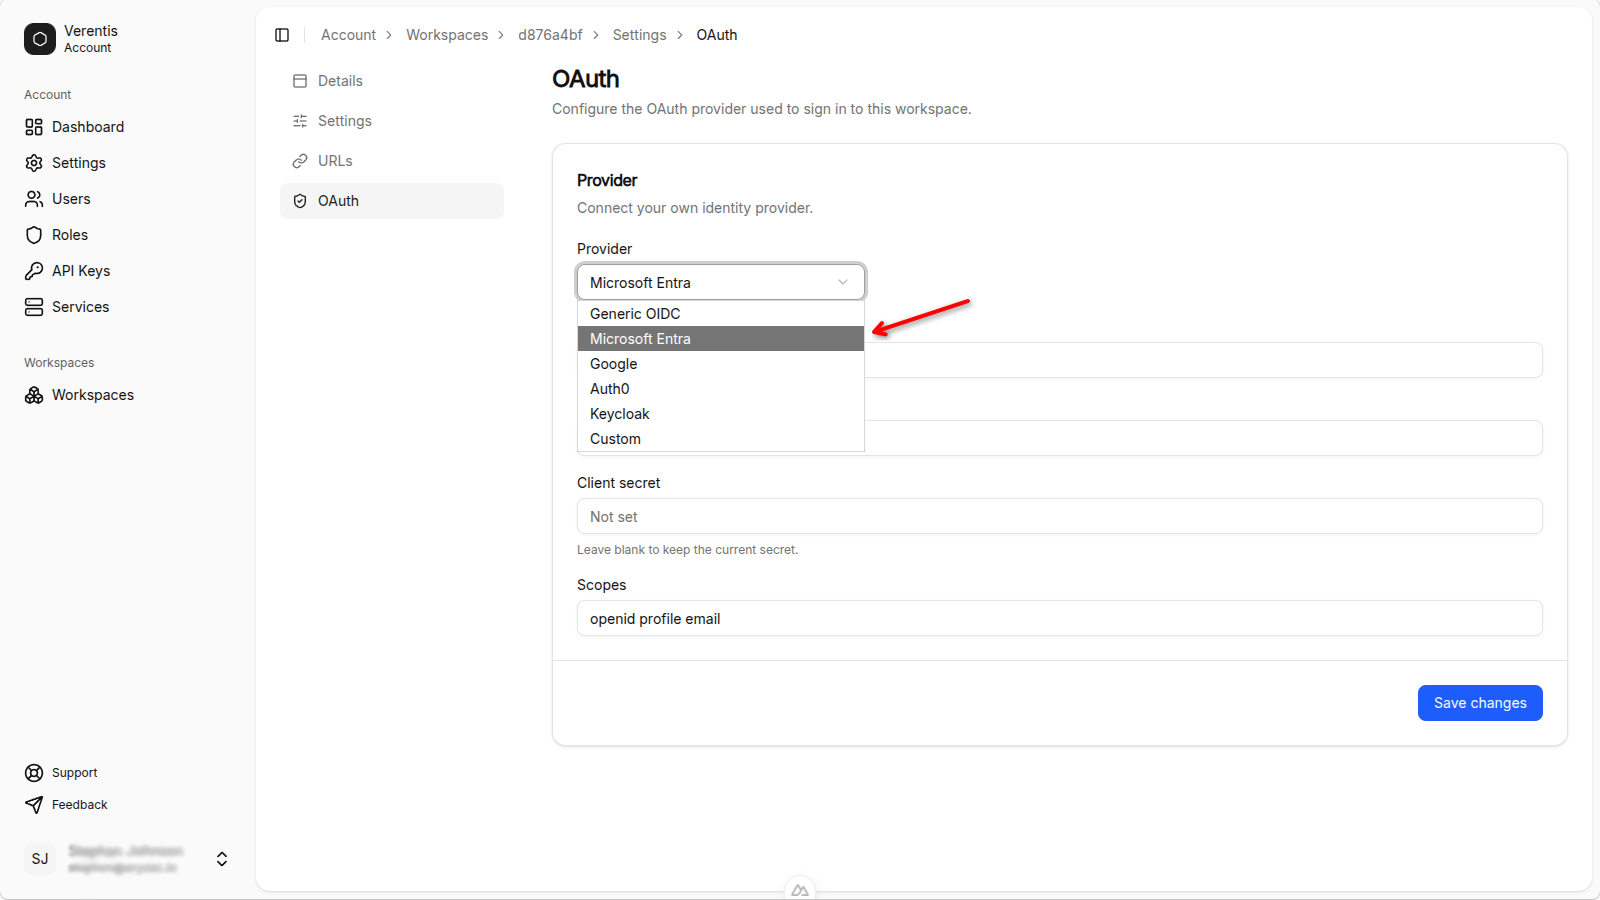
Choose Microsoft Entra as the provider
Set Provider to Microsoft Entra.
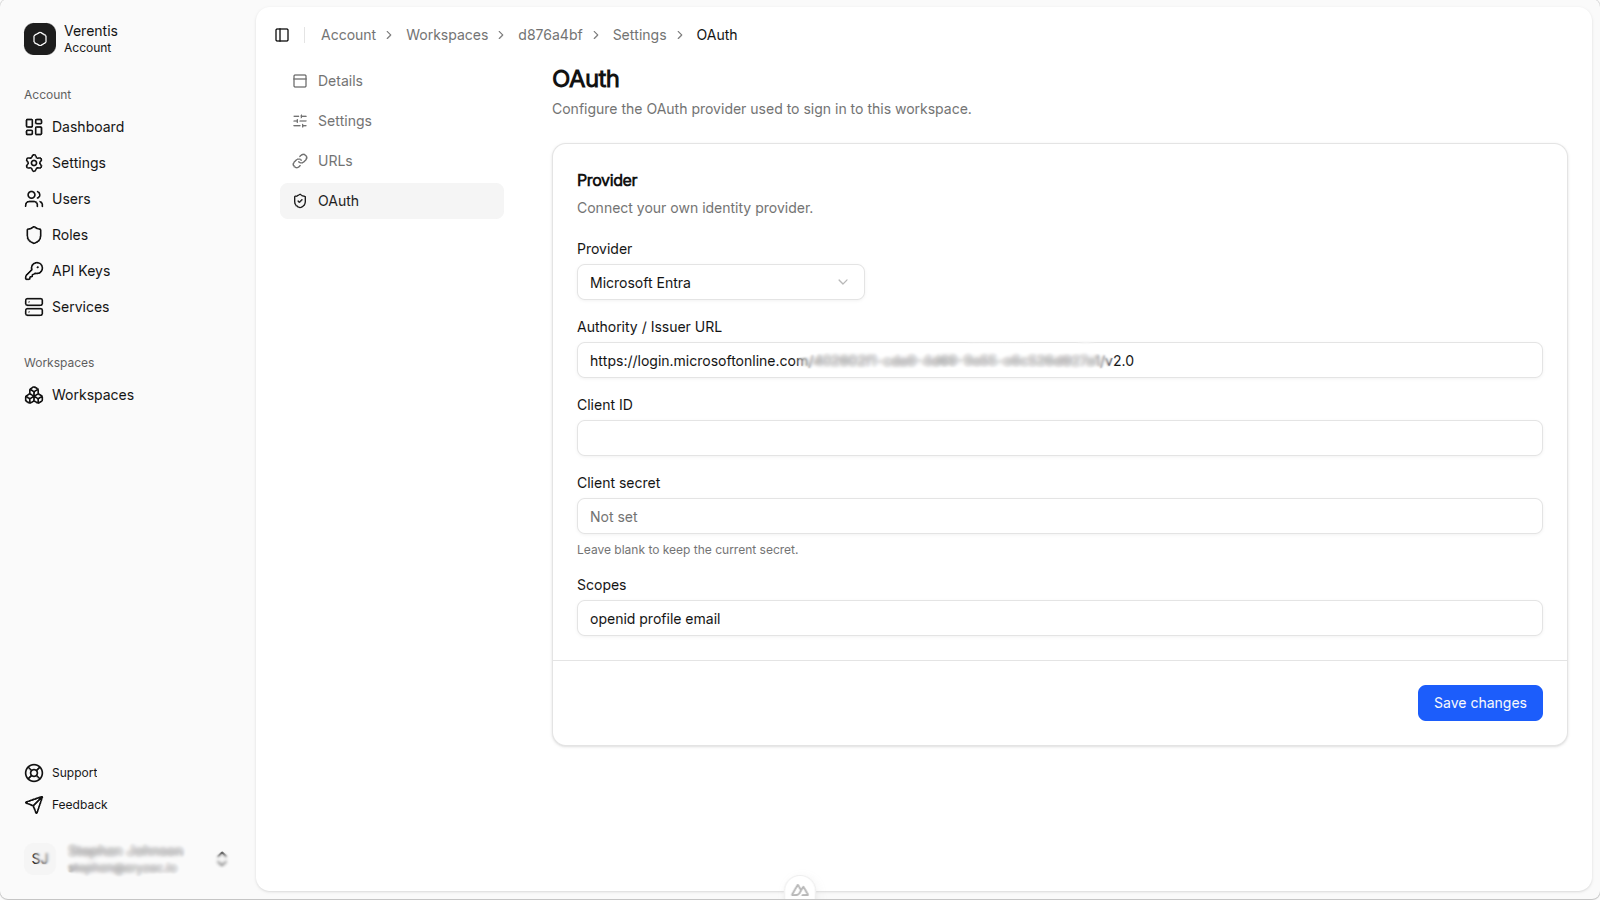
Enter the authority / issuer URL
In Authority / Issuer URL, enter your tenant's sign-in address, built from the Directory (tenant) ID you copied:
https://login.microsoftonline.com/<tenant-id>/v2.0
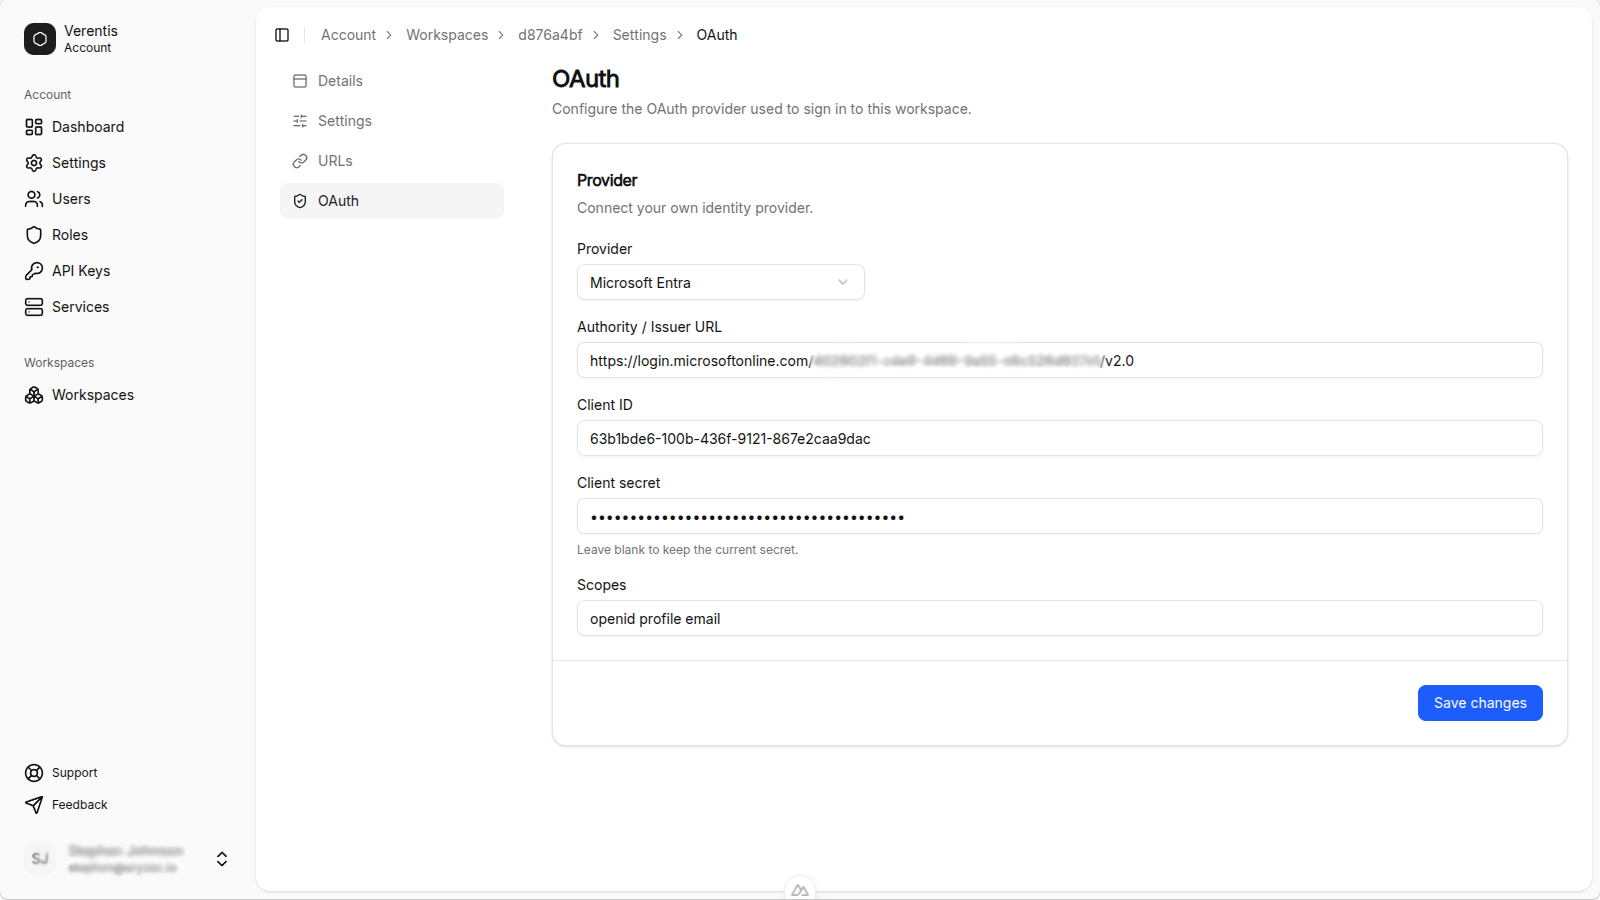
Enter the client ID and client secret
Paste the Application (client) ID into Client ID, and the secret Value into Client secret.
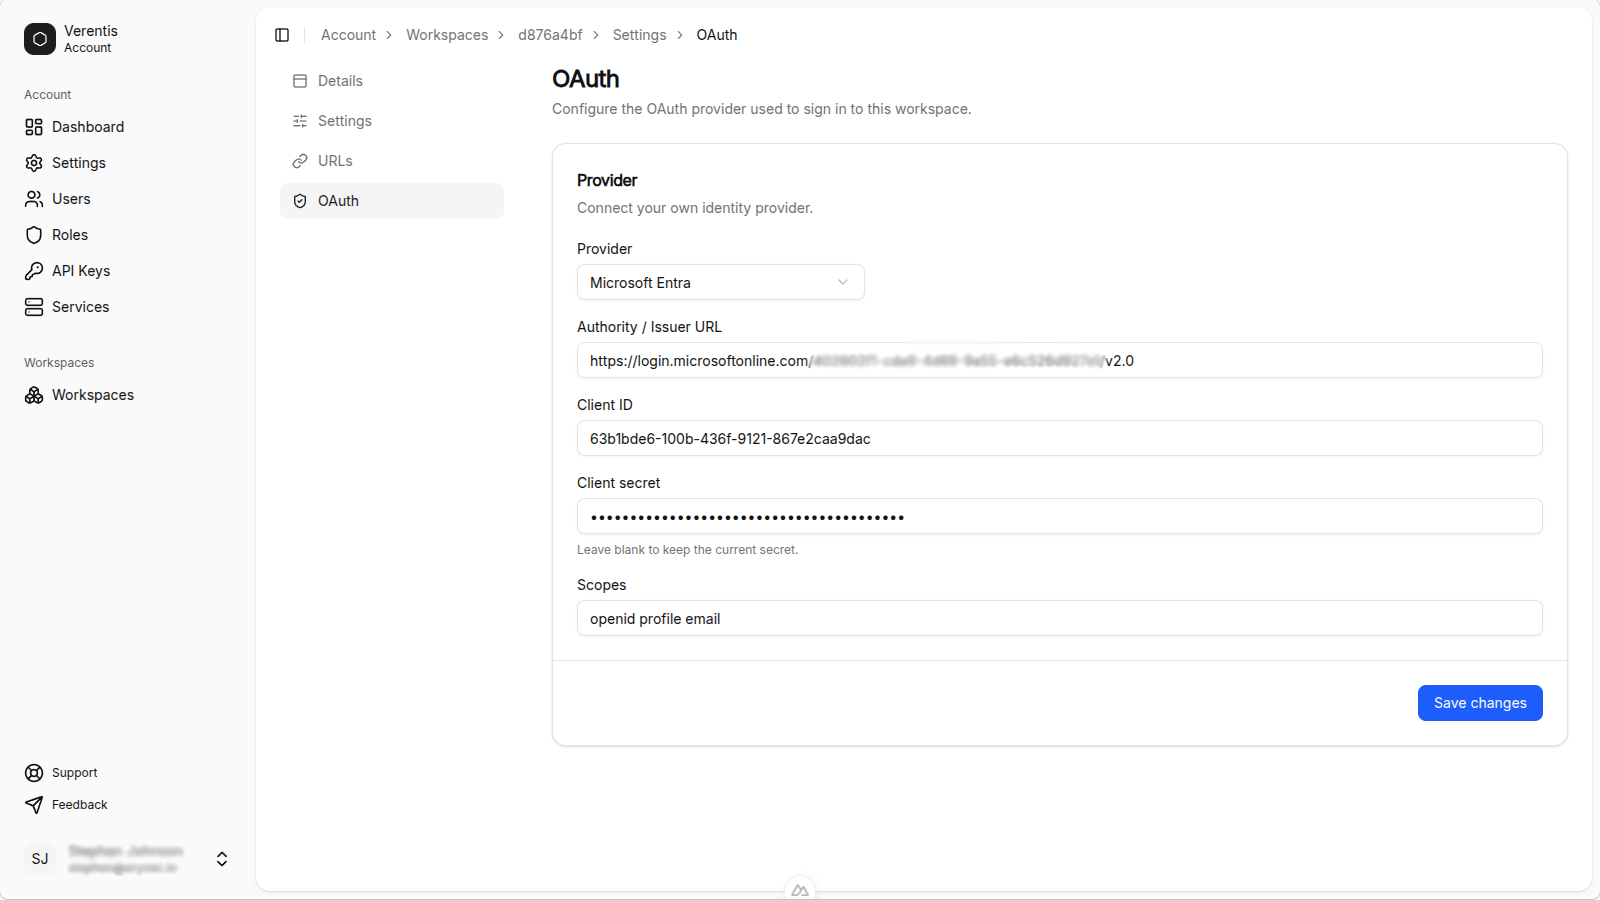
Set the scopes
Leave Scopes as openid profile email unless your organisation tells you otherwise. These ask Microsoft to sign the person in and share their name and email address.
Enable the connection and save
Turn Enabled on, then select Save.
Test signing in
Open the workspace and sign in with a Microsoft 365 account from your organisation. You should be sent to Microsoft to sign in, then returned to the workspace.
Troubleshooting
Redirect URI mismatch (AADSTS50011)
The redirect URL in Microsoft Entra ID must match Verentis exactly. Open the app's Authentication page and confirm the Web redirect URI matches Verentis's callback address shown above, including https:// and with no trailing slash.
The client secret has expired
Client secrets expire on the date you set. If sign-in stops working, create a new secret in Certificates & secrets, then update the Client secret in the Verentis OAuth settings.
Admin consent is required
If people see a message that an administrator must approve the app, a Microsoft Entra administrator needs to select Grant admin consent on the app's API permissions page.
People from your organisation can't sign in
Check that Supported account types matches who should have access, and that the Directory (tenant) ID in your authority URL is correct.